
How to Install Flexible Stone Veneer Panels
How to Install Flexible Stone Veneer Panels: A Practical Step-by-Step Guide
To install flexible stone veneer panels successfully, I recommend following six basic principles: prepare a clean and stable substrate, confirm the panel and adhesive are compatible, dry-fit every piece, apply adhesive evenly, press the panel firmly into place, and allow sufficient curing time before cleaning or loading the surface. Flexible stone veneer is easier to handle than rigid stone, but it still requires careful planning around corners, joints, moisture, and substrate movement. The exact adhesive, temperature range, curing time, and finishing method must always follow the product technical data sheet.
Please visit our website for more information on this topic.
In this guide, I explain the installation process from project preparation through final inspection. I also cover common mistakes, commercial project considerations, and practical questions that buyers should resolve with a qualified supplier before ordering. Because flexible stone panels can differ in backing, thickness, surface texture, and intended application, I use conservative recommendations where the manufacturer’s instructions should take priority.
Before Installation: Define the Project Conditions
Before I recommend any installation method, I review where the panels will be used and what conditions they will face. Interior feature walls, reception areas, columns, ceilings, exterior façades, wet rooms, and curved surfaces may require different panel specifications and adhesives. A product suitable for a dry interior wall should not automatically be assumed suitable for continuous moisture, direct water exposure, or severe outdoor conditions.
I also check the substrate, panel dimensions, edge details, project quantity, and installation sequence. For a B2B project, the installation team should receive the panels, adhesive information, layout drawings, and sample approvals before site work begins. This reduces the risk of color variation, incorrect cutting, or delays caused by missing compatible materials.
Recommended Tools and Materials
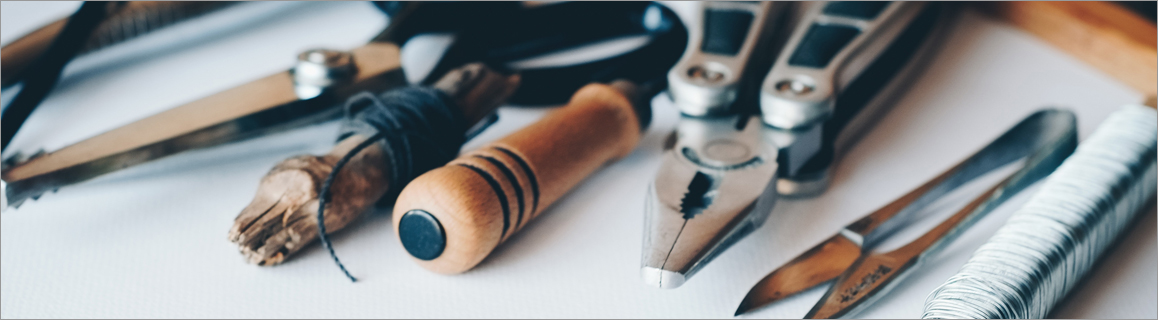
- Flexible stone veneer panels and approved adhesive
- Measuring tape, straightedge, level, and pencil
- Fine-tooth saw, sharp utility knife, or cutting tool recommended for the panel construction
- Notched trowel or other adhesive-spreading tool specified by the adhesive supplier
- Clean rollers, hand pressure tools, or a soft pressing block
- Clean cloths, masking tape, and temporary supports where needed
- Suitable primer, sealant, or edge treatment if required by the system specification
I do not assume that one adhesive works for every flexible stone veneer panel. The backing may be mineral-based, resin-supported, mesh-reinforced, or constructed with another system, so the adhesive must be selected according to both the panel and the substrate. A small test installation is a practical way to check adhesion, appearance, open time, and removal behavior before beginning full production.
Step-by-Step Installation Process
Step 1: Inspect and Prepare the Substrate
The substrate must be sound, clean, dry, and sufficiently flat for the selected panel system. I remove dust, oil, loose paint, weak plaster, and other contaminants that could interfere with adhesion. Cracks, holes, uneven joints, or unstable areas should be repaired before the panels are installed.
For concrete, cement board, plaster, drywall, wood-based boards, and existing finishes, I verify compatibility rather than relying on appearance alone. If the substrate is dusty or highly absorbent, the adhesive or primer manufacturer may require a suitable primer. I also check that the wall is not experiencing active moisture infiltration, because adhesive failure can result when water enters from behind the panel.
Step 2: Confirm Site Conditions and Acclimatize the Panels
I store the panels flat or in the position recommended by the supplier, protected from direct sunlight, rain, excessive heat, and mechanical damage. Before cutting, I inspect every panel for visible damage, surface variation, backing separation, or unacceptable color differences. Natural stone surfaces can show variation, so I arrange panels from several cartons or batches to create a balanced appearance.
Installation should take place within the environmental limits stated by the panel and adhesive manufacturers. As a planning reference, some installation systems specify an application range around 10–30°C, but this is not a universal requirement. If the technical data sheet requires acclimatization, I allow the stated period; a 24-hour acclimatization period is sometimes used, but the supplier’s instruction remains controlling.
Step 3: Plan the Layout and Dry-Fit the Panels
I mark a level starting line and plan the layout before applying adhesive. This is especially important around doors, windows, electrical outlets, corners, columns, and visible termination points. Dry-fitting allows me to identify narrow strips, awkward joints, repeated patterns, and areas where a panel should be rotated or exchanged.
I measure the wall in sections and maintain the joint approach specified for the product. Flexible stone veneer may be installed with tight visual joints or with designed gaps, depending on the appearance and finishing system. I avoid forcing panels into position, because excessive stress can create distortion, edge lifting, or visible irregularities.
Step 4: Cut the Panels Carefully
I use the cutting tool recommended for the panel construction and make trial cuts on a spare piece whenever possible. For visible edges, I mark the finished side carefully and support the panel during cutting to reduce chipping or fraying of the backing. Curved cuts and openings should be measured twice before material is removed.
After cutting, I inspect the back of the panel and remove loose particles that could affect bonding. I also test the cut piece in its final position before applying adhesive. For a commercial project, I keep a small quantity of approved spare material for later repairs, because an exact color or surface match may not be available from a different production batch.
Step 5: Apply the Approved Adhesive
I mix or prepare the adhesive exactly as instructed by its manufacturer, including the correct component ratio, mixing method, and usable working time. I spread the adhesive on the substrate with the specified tool, maintaining consistent coverage rather than applying isolated spots. Spot bonding can create hollow areas and uneven pressure unless the product system specifically permits it.
I avoid applying more adhesive than can be covered within the adhesive’s open time. For planning purposes, the working area should be small enough that the surface remains receptive when the panel is placed. Adhesive bed thickness must also follow the system instructions; a 1–2 mm layer may be appropriate for some products but is not a universal specification for all flexible stone veneer panels.
With competitive price and timely delivery, JBN sincerely hope to be your supplier and partner.
Step 6: Position, Press, and Align Each Panel
I place the panel from the planned reference line and press it progressively across the surface. A clean roller, pressing block, or hand pressure can help achieve continuous contact, depending on the panel construction. I pay particular attention to edges, corners, seams, and areas around openings, where incomplete contact is more likely to become visible.
I check alignment with a level and straightedge while the adhesive is still workable. If the panel needs adjustment, I move it gently rather than repeatedly lifting and replacing it. Adhesive squeezed into joints should be removed according to the product instructions, and the face of the stone should be cleaned before residue hardens.
Step 7: Treat Corners, Joints, and Terminations
Corners may be finished with folded panels, separate corner pieces, a controlled butt joint, or another detail approved for the product. I choose the method during the design stage because corner treatment affects material quantity and visual continuity. On curved features, I confirm the minimum bending radius before attempting installation.
At exposed edges, I use the recommended trim, sealant, edge coating, or finishing method where required. I do not assume that a raw cut edge is suitable for exterior or moisture-prone applications. Expansion, movement, and perimeter joints should remain functional where the substrate or building design requires them.
Step 8: Allow Curing and Complete the Final Inspection
I protect the newly installed panels from impact, water, vibration, and movement while the adhesive cures. Many adhesive systems require approximately 24–48 hours before normal handling, but the actual curing period depends on adhesive type, temperature, humidity, substrate absorption, and panel weight. I never remove temporary supports or apply sealant until the written system instructions allow it.
After curing, I inspect the installation for loose edges, open joints, adhesive residue, uneven alignment, and visible damage. If sealing is required, I apply only a compatible sealer after confirming that it will not change the stone’s color, gloss, or surface texture. I document the completed work with photographs and retain batch information for future maintenance or replacement orders.
Key Decisions That Affect Installation Quality
Substrate Selection
A stable substrate is more important than simply choosing a strong adhesive. If the wall moves, sheds dust, or contains trapped moisture, even a compatible adhesive may not provide durable performance. For large commercial installations, I recommend documenting substrate preparation and approving a test area before full installation.
Adhesive and Application Method
The adhesive should be selected by reviewing panel backing, substrate type, indoor or outdoor exposure, temperature, moisture, and expected movement. The supplier should provide application instructions, coverage guidance, working time, and curing requirements where available. A low-cost adhesive that is not compatible with the backing can increase labor, rework, and replacement risk.
Visual Arrangement
Flexible stone veneer is a decorative material as well as a functional finish, so installation quality includes visual balance. I distribute panels from different cartons when variation is expected and avoid concentrating similar tones in one area. A signed sample or mock-up gives the project team a reference for color, joint width, corner appearance, and acceptable natural variation.
Common Installation Mistakes to Avoid
- Installing over dusty, damp, unstable, or contaminated substrates
- Using an adhesive without confirming compatibility with the panel backing
- Skipping dry-fitting around corners, openings, and narrow wall sections
- Applying adhesive over an area that exceeds its workable open time
- Leaving hollow spots or unbonded edges behind the panel
- Forcing a panel beyond the manufacturer’s permitted bending radius
- Cleaning adhesive residue only after it has fully hardened
- Sealing the surface without testing the effect on color and texture
- Failing to reserve spare panels for future repairs or replacements
These mistakes are preventable when the installation team follows a written method statement. For larger projects, I suggest using a sample panel or mock-up to confirm the complete process before approving production installation. This creates a practical reference for installers, site managers, architects, and procurement teams.
B2B Project Support from JBN
As a flexible stone veneer panel manufacturer and supplier in the ceramics industry, JBN can support buyers during product selection and project preparation. We can discuss panel format, surface appearance, backing construction, application environment, packaging, and quantity requirements based on the project brief. Because specifications differ by product, I recommend requesting the current technical information and confirming the intended substrate before purchase.
For repeat or larger orders, I also encourage buyers to clarify sample approval, production consistency, inspection requirements, carton protection, spare quantity, and shipping schedule in advance. A supplier should be able to explain which installation conditions are supported and which applications require additional testing or professional review. This approach helps reduce sourcing risk without making unsupported performance promises.
Installation Checklist and Next Steps
Before installation, confirm the substrate, environmental conditions, panel quantity, adhesive, tools, layout, and finishing details. During installation, monitor coverage, alignment, edge contact, joint appearance, and curing protection. After installation, complete a visual inspection, record the batch information, and follow the recommended cleaning and maintenance procedure.
My direct recommendation is to treat flexible stone veneer panels as a complete installation system rather than as a standalone decorative sheet. Start with the technical data sheet, approve a small test area, and use the same substrate preparation, adhesive, and finishing method for the full project. If you are sourcing panels for a commercial project, contact JBN with your dimensions, application location, substrate type, expected quantity, and delivery requirements so we can help you evaluate a suitable solution and prepare the next step for quotation.
For more Flexible Stone Veneer Panelsinformation, please contact us. We will provide professional answers.
Previous: None
Next: Porcelain Tile Manufacturer Buying Guide: How to Choose a Reliable Supplier
If you are interested in sending in a Guest Blogger Submission,welcome to write for us!
Comments
0